Date published: 9-16-2013
Rails version: 4.0.0
What is Bootstrap?
Bootstrap was developed by a group at Twitter to provide a consistent graphical framework for their web sites. Since it was released, it’s become one of the most popular suites of graphical tools for web site development. It includes CSS templates, grid layout classes, and responsive elements that make it easy to develop one site that can be easily viewed on screens of all sizes. Perhaps the biggest benefit to adding it to a Rails project is the fact that there is already a gem that includes all the functionality of Bootstrap. It’s a good idea when learning how to program a new language to have a basic project template that you can build upon for any new projects you want to make. This is doubly true in Ruby on Rails where every project has a visual component, so having a basic web site template to build off of is really important.
This tutorial assumes that you already have a version of Ruby installed on your machine. If you haven’t installed Ruby yet, check out the Ruby Version Manager as it makes it easy to install different versions of Ruby and Rails on your machine depending on the version used in whatever tutorial you’re following. If you’re using a Mac like I do, I recommend installing it through Homebrew as illustrated in this blog post. It’s also useful if you have a working knowledge of Git, and I’ll be including references to it throughout this post. Git is the most popular version of source control in the Ruby on Rails community, but feel free to substitute a different version control program if you don’t use Git.
Creating a new project
The first thing we want to do is have Rails generate a new project for us. Launch the Terminal app and change to the directory where you want the project to be created, in my case a folder called Projects/Rails/. We’re going to use the name template_bootstrap_site for our project and don’t want Rails to autogenerate tests for us, so enter the following command in the terminal:
$ rails new template_bootstrap_site --skip-test-unit
You should see several messages for what Rails is doing to create the project in the terminal window. After Rails has created all the assets, it will automatically run bundle install to make sure you have all the gems you need installed. You can verify that the site was created by running the following commands in the terminal:
$ cd template_bootstrap_site/
$ rails server
Now if you point your browser at http://localhost:3000/ you’ll see the basic Rails information page.
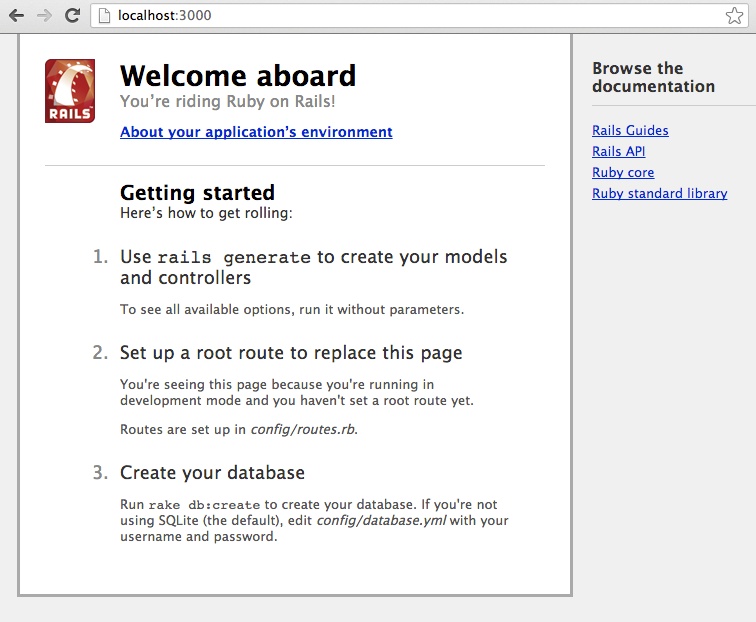
Rails default page
Initializing a Git repository
The first thing we want to do now that we’ve generated our project is create a Git repository to store our changes. A .gitignore file was created by the Rails generator, but I like to modify it so that we ignore a few other folders and files. It isn’t really necessary for the simple project we’re making here, but I do it at this point because projects I plan on building off of this template will likely need to ignore these sorts of files. Open the .gitignore file and add the following lines at the bottom of the file:
# Ignore other unneeded files.
doc/
*.swp
*~
.project
.DS_Store
.idea
public/system/
All that’s left is to initialize the Git repository and make our initial commit. Enter the following commands into the terminal:
$ git init
Initialized empty Git repository in /Projects/Rails/template_bootstrap_site/.git/
$ git add .
$ git commit -m "Initial commit"
The terminal should print out a list of all the files and folders that are being added to the repository. You can check to make sure it was created correctly by running this command:
$ git status
# On branch master
nothing to commit, working directory clean
Creating some basic pages
The first thing we want to do to our new project is create a few basic pages of our own to show instead of the default page that was generated by Rails. In order for Rails to know how to find the pages we are making, we have to tell it where to look in the routes file. Open this file at config/routes.rb and look at what’s already included. There is a lot there, but it is all commented out. The part we want to change is called root, which tells Rails where to look when we go to the home page. Modify the routes.rb file to have the following lines:
TemplateBootstrapSite::Application.routes.draw do
  # The priority is based upon order of creation: first created -> highest priority.
  # See how all your routes lay out with "rake routes".

  # You can have the root of your site routed with "root"
  root 'static_pages#home'
  get '/about', to: 'static_pages#about'

  ...
end
Feel free to leave all the comments in the file or delete them as you please. I tend to leave all the comments that Rails autogenerates as they give good hints for where to look if you want to expand on what’s already there.
So what are those two lines doing? The first line is telling Rails that when we load the page at http://localhost:3000/ to look for a controller called “static_pages” and find the action named “home.” The second line says that when we load the page at http://localhost:3000/about/ to also look in the “static_pages” controller for an action named “about.” If you start up the server and try to reload the page, you’ll see an error because we haven’t defined the controller or the views that Rails is looking for.
The first thing we’ll do is create the static pages controller. Create a new Ruby file at app/controllers/static_pages_controller.rb and type in the following code:
class StaticPagesController < ApplicationController
  def home
  end

  def about
  end
end
There’s not much happening in our controller because these are static pages. The controller would normally handle pulling information out of the database to show on the page, but since static pages don’t have dynamic content, there’s nothing to do other than define the actions so that Rails knows they exist.
The important thing to get our pages showing is to create the views. The views will hold all the HTML code to show what we want to show on the page. We’ll have to create separate pages for both the home and about actions. Create a new file at app/views/static_pages/home.html.erb and type in the following code:
<h1>Welcome</h1>
<p>
  Lorem ipsum dolor sit amet, consectetur adipisicing elit, sed do eiusmod tempor incididunt ut labore et dolore magna aliqua. Ut enim ad minim veniam, quis nostrud exercitation ullamco laboris nisi ut aliquip ex ea commodo consequat. Duis aute irure dolor in reprehenderit in voluptate velit esse cillum dolore eu fugiat nulla pariatur. Excepteur sint occaecat cupidatat non proident, sunt in culpa qui officia deserunt mollit anim id est laborum.
</p>
<%= link_to "Visit about page", about_path %>
Create a second file at app/views/static_pages/about.html.erb and type in the following code:
<h1>About</h1>
<p>
  Lorem ipsum dolor sit amet, consectetur adipisicing elit, sed do eiusmod tempor incididunt ut labore et dolore magna aliqua. Ut enim ad minim veniam, quis nostrud exercitation ullamco laboris nisi ut aliquip ex ea commodo consequat. Duis aute irure dolor in reprehenderit in voluptate velit esse cillum dolore eu fugiat nulla pariatur. Excepteur sint occaecat cupidatat non proident, sunt in culpa qui officia deserunt mollit anim id est laborum.
</p>
Now if you run the Rails server and load http://localhost:3000/ you’ll see the new home page. If you click the link at the bottom, it will load the About page. The pages don’t look that great though, so we’re going to add Bootstrap and give the entire site a clean, professional look.
Adding Bootstrap
The main reason for using a set of tools like Bootstrap is to give our web site a uniform look and layout elements used for navigation in a pleasing way. Before we can get any of the benefits of Bootstrap, we have to add it to our project first. Open up the Gemfile, and you’ll see that Rails has already added a number of gems for us automatically, but there’s not much organization. Replace the contents of the Gemfile with the following:
source 'https://rubygems.org'

gem 'rails', '4.0.0'
gem 'bootstrap-sass', '2.3.2.0'
gem 'faker', '1.1.2'
gem 'will_paginate', '3.0.4'
gem 'bootstrap-will_paginate', '0.0.9'

# Bundle edge Rails instead:
# gem 'rails', :git => 'git://github.com/rails/rails.git'

group :development, :test do
  gem 'sqlite3', '1.3.7'
  gem 'rspec-rails', '2.14.0'
end

group :development do
  gem 'annotate', '2.5.0'
end

group :test do
  gem 'capybara', '2.1.0'
  gem 'factory_girl_rails', '4.2.1'
end

# Gems used only for assets and not required
# in production environments by default.
group :assets do
  gem 'sass-rails',   '~> 4.0.0'
  gem 'coffee-rails', '~> 4.0.0'

  # See https://github.com/sstephenson/execjs#readme for more supported runtimes
  # gem 'therubyracer', :platforms => :ruby

  gem 'uglifier', '>= 1.3.0'
end

group :doc do
  # bundle exec rake doc:rails generates the API under doc/api.
  gem 'sdoc', require: false
end

gem 'jquery-rails'

# Turbolinks makes following links in your web application faster. Read more: https://github.com/rails/turbolinks
gem 'turbolinks'

# Build JSON APIs with ease. Read more: https://github.com/rails/jbuilder
# gem 'jbuilder', '~> 1.2'

# Use ActiveModel has_secure_password
# gem 'bcrypt-ruby', '~> 3.0.0'

# Use unicorn as the app server
# gem 'unicorn'

# Use Capistrano for deployment
# gem 'capistrano', group: :development

# Use debugger
# gem 'debugger', group: [:development, :test]
Most of what is in the new Gemfile is the same as what Rails generated but moved around into groups so that gems are being loaded only when they’re needed. The important gems that we added for Bootstrap are bootstrap-sass and bootstrap-will_paginate. The other extra gems are ones that I use quite often, but for now you can safely ignore them. Since we’ve updated the Gemfile, stop any Rails server you may have running and install the new gems by typing in the console:
$ bundle install
The only thing left to do to add Bootstrap to our pages is to make sure that the Bootstrap Javascript and CSS files are being loaded correctly. Find the file named app/assets/javascripts/application.js and add the highlighted line to the file:
//= require jquery
//= require jquery_ujs
//= require turbolinks
//= require bootstrap
//= require_tree .
Now open the app/assets/stylesheets/application.css file and add the highlighted line:
*= require_self
*= require bootstrap-reskin
*= require custom
Now we have to create the bootstrap-reskin file we just referenced. Create a file named app/assets/stylesheets/bootstrap-reskin.css.scss and type the following:
@import "bootstrap";

/* If you don't like the default Bootstrap color scheme, you can download custom Bootstrap
   reskin code from:

http://bootswatch.com/

   Download the CSS file for the reskin you want to use and paste all the code here, but
   make sure it comes before the call to import the responsive module.
*/

/* Bootstrap responsive has to be after the reskin */
@import "bootstrap-responsive";
You should note that importing bootstrap-responsive isn’t required, but it will make it so that the web pages will automatically resize themselves to look good on mobile-sized screens as well as the browser on your computer. That’s all we have to do to setup Bootstrap so that Rails can find it and use it when displaying the pages of our web site. The next thing we have to do is rewrite our views to make use of the classes Bootstrap has made available.
Setting up the views
Rails uses .erb files to hold the code for what to display when a browser loads a page. The most important of these is found at app/views/layouts/application.html.erb. This file sets up the basic layout of all pages across the site. Overwrite what’s already in the file with the following code:
<!DOCTYPE html>
<html>
  <head>
    <meta name="viewport" content="width=device-width, initial-scale=1.0">
    <title><%= yield(:title) %></title>
    <%= stylesheet_link_tag    "application", media: "all", "data-turbolinks-track" => true %>
    <%= javascript_include_tag "application", "data-turbolinks-track" => true %>
    <%= csrf_meta_tags %>
    <%= render 'layouts/shim' %>
  </head>
  <body>
    <%= render 'layouts/header' %>
    <div class="container">
      <% flash.each do |key, value| %>
        <div class="alert alert-<%= key %>"><%= value %></div>
      <% end %>
      <%= yield %>
      <%= render 'layouts/footer' %>
      <%= debug(params) if Rails.env.development? %>
    </div>
  </body>
</html>
So what is going on in this file? The first change to note is the title tag. We added a call to yield(:title) because we don’t want to show the same title on every page of our web site. For each of the pages we make, we’ll define the title variable that was referenced here so that the title that shows up on the tab in our web browser will change for each page. This will make more sense when we do a small rewrite of the HTML on the home and about pages later in the tutorial.
You’ll notice there are now several places where we call the render method. The string passed in points to the file that we want rendered in place of the method call. These files are called partials, and we’ll create them in a moment. For now you should know that partials are also .erb files that hold commonly used snippets of HTML code. The point of a partial is to have one representation of how we want to show certain elements of the view that can be used by many different pages, and if we decide to change the way it looks, we only have to change it in one place and our entire site will be updated. We’ll create partials for the header and footer in just a moment.
There are two other points where we make calls to be interpreted by Ruby. The first is to show any error messages in the flash memory. It’s very common for messages to be passed to the user using the flash, and we want to display those messages to the user because they are often relaying important information the user should be aware of. The other call is to the debug method, and it will show information about the state of Rails that may be useful in debugging our application.
The first partial file we need to create is called shim. All partial files should have names that start with an underscore, so create a new file called app/views/layouts/_shim.html.erb:
<!--[if lt IE 9]>
<script src="http://html5shim.googlecode.com/svn/trunk/html5.js">
</script>
<![endif]-->
There’s not much to this file; all it does is add a call to some code that will make the web page run better if the user is using Internet Explorer. This file is a good illustration of the use of partials as calls to things like scripts that are to be loaded are likely to show up on every page we want to show. In the future if for some reason the JS file we wanted to load were to be moved to a different URL, we could update just the shim file and all our pages would be updated.
Next we’ll add the header partial for the navbar that we want to show at the top of our pages. This is the first bit of HTML code that we’ll write that uses the Bootstrap classes, and I’ll explain what it’s doing after the code snippet. For now, create the file app/views/layouts/_header.html.erb and type in the following:
<header>
  <div class="navbar navbar-inverse navbar-static-top">
    <div class="navbar-inner">
      <div class="container">
        <a class="btn btn-navbar" data-toggle="collapse" data-target=".nav-collapse">
          <span class="icon-bar"></span>
          <span class="icon-bar"></span>
          <span class="icon-bar"></span>
        </a>
        <%= link_to "Wordplay Software", root_path, class: "brand" %>
        <div class="nav-collapse collapse">
          <ul class="nav">
            <li><%= link_to "Link", "#" %></li>
            <li><%= link_to "Link", "#" %></li>
            <li><%= link_to "Link", "#" %></li>
          </ul>
          <ul class="nav pull-right">
            <li><%= link_to "About", about_path %></li>
          </ul>
        </div>
      </div>
    </div>
  </div>
</header>
There’s a lot going on in this little section of code that I need to explain. Lines 1-9 are setting up the navbar based on the Bootstrap classes. The first link we create is pointing to the root_path and has a class of “brand.” This is a special class for a navbar telling it that this is the branding of our web site, and we want it to look special compared to the other links on the navbar. You’ll want to change this depending on the name of your web site instead of calling it “Wordplay Software.” I put several placeholder links pointing to “#” just so we’ll have some extra links on there to show what it will look like on a real site that has more content. Finally I added a link to the about page in a nav with the pull-right class added so it’s on the right side of the navbar. For more information about what exactly is going on with all the nav classes shown here, check out the Bootstrap documentation.
The only other partial we need to create is the footer. Create a file called app/views/layouts/_footer.html.erb and type in the following:
<footer class="footer">
  <small>
    ©2012 by <a href="http://www.wordplaysoftware.com">
    Wordplay Software LLC</a>
  </small>
  <nav>
    <ul>
      <li><a href="#">Contact</a></li>
    </ul>
  </nav>
</footer>
The footer is much less complex than the header. In fact, there’s almost nothing to the HTML that we’re showing here, just a copyright notice and placeholder link to a contact page or email. Unfortunately since we’re not using Bootstrap to style the footer, we’ll have to add some custom CSS to our project. Create the app/assets/stylesheets/custom.css.scss file and type in the following:
/* mixins, variables, etc. */

$grayLighter: #cccccc;
$gray: #999999;
$grayDarker: #444444;

@mixin box_sizing {
  -moz-box-sizing: border-box;
  -webkit-box-sizing: border-box;
  box-sizing: border-box;
}

/* universal */

html {
  overflow-y: scroll;
}

section {
  overflow: auto;
}

header {
  margin-bottom: 5px;
}

.center {
  text-align: center;
  h1 {
    padding-bottom: 10px;
  }
}

/* header */

header {
}

/* footer */

footer {
  margin-top: 45px;
  padding-top: 5px;
  border-top: 1px solid $grayLighter;
  color: $grayLighter;
  a {
    color: $gray;
    &:hover {
      color: $grayDarker;
      text-decoration: none;
    }
  }
  small {
    float: left;
  }
  ul {
    float: right;
    list-style: none;
    li {
      float: left;
      margin-left: 10px;
    }
  }
}

/* miscellaneous */

.debug_dump {
  clear: both;
  float: left;
  width: 100%;
  margin-top: 45px;
  @include box_sizing;
}
This will setup the footer the way we want it to look and adds a little bit more for other classes we may want to use later. At this point, you can run the Rails server and see what the site looks like. It looks a lot better with a header at the top and the footer at the bottom. If you look at the title on the tab of your browser, you’ll probably notice it says “localhost:3000″ or something similar. We want it to have a real title, so we’ll add that to our individual pages next. First though, create a new partial called app/views/partials/_lorem.html.erb and add this code:
<p>
  Lorem ipsum dolor sit amet, consectetur adipisicing elit, sed do eiusmod tempor incididunt
  ut labore et dolore magna aliqua. Ut enim ad minim veniam, quis nostrud exercitation ullamco
  laboris nisi ut aliquip ex ea commodo consequat. Duis aute irure dolor in reprehenderit in
  voluptate velit esse cillum dolore eu fugiat nulla pariatur. Excepteur sint occaecat
  cupidatat non proident, sunt in culpa qui officia deserunt mollit anim id est laborum.
</p>
Now rather than having to copy and paste that long string everywhere we want to test the layout, we can just render the partial. If you remember earlier, we already added a method call in application.html.erb to show the title, but we need to define the title on each page so that it doesn’t just show the current URL. We’ll also add a little bit of formatting using classes supplied by Bootstrap to make the page look cleaner. Open the app/views/static_pages/home.html.erb file and change to look like:
<% provide(:title, "Home Page") %>
<div class="row">
  <div class="hero-unit">
    <div class="center">
      <h1>Welcome</h1>
      <%= render 'partials/lorem' %>
    </div>
  </div>
</div>
<div class="row">
  <div class="span6">
    <h2>span6 - Column 1</h2>
    <%= render 'partials/lorem' %>
  </div>
  <div class="span6">
    <h2>span6 - Column 2</h2>
    <%= render 'partials/lorem' %>
  </div>
</div>
<div class="row">
  <div class="span3">
    <h2>span3 - Column 1</h2>
    <%= render 'partials/lorem' %>
  </div>
  <div class="span3">
    <h2>span3 - Column 2</h2>
    <%= render 'partials/lorem' %>
  </div>
  <div class="span3">
    <h2>span3 - Column 3</h2>
    <%= render 'partials/lorem' %>
  </div>
  <div class="span3">
    <h2>span3 - Column 4</h2>
    <%= render 'partials/lorem' %>
  </div>
</div>
I’ll explain a bit of what we changed, but first open the app/views/static_pages/about.html.erb file and change its code to be:
<% provide(:title, "About Page") %>
<div class="center">
  <h1>About</h1>
</div>
<div class="row">
  <div class="span4">
    <%= render 'partials/lorem' %>
  </div>
  <div class="span8">
    <div class="well">
      <%= render 'partials/lorem' %>
    </div>
  </div>
</div>
Ok, so what are we doing with the changes we made? The first thing we did was use the provide method to give titles to the pages. We’re telling Ruby to create a variable and assign the string that comes after to that variable. Even though the pages are nested inside the application.html.erb file, it can now use the variable we provided to give dynamic titles to our pages. Any new pages we made should have a similar call to provide a title to be used for each page.
Of the classes we use to show our information on the page, we created the “center” class in our custom CSS file. The rest are provided by Bootstrap. The “well” and “hero-unit” classes create different styles of bordered box areas. The row and span classes are used to layout content on the page into grids. The concepts behind the grid layout are explained in the Bootstrap documentation. Your page should look similar to the screenshot below.

Home page
The only thing left to do is commit all our changes to Git. Go to the console window and type in these commands:
$ git add .
$ git commit -m "Added Bootstrap and laid out site template"
What next?
Now that we’ve got a basic layout made and Bootstrap working, we can start making our own projects. I would encourage you to read the wonderful Getting started page at the Bootstrap site. Play around with all the different Bootstrap classes and different ways to handle the layout and learn what all it’s possible to do. There’s way more than I’ve shown in this tutorial.
Also, you may not have realized it, but the site as we’ve built it already handles different sizes of screens depending on the device you’re using. You can test this out by shrinking and expanding your browser window. The header will change to show a callout when it gets small enough, and the columns that we’re displaying will move and resize to be easily viewable no matter how big or small the window.
The source code for this tutorial can be found on Github at:


