Date published: 10-14-2013
Rails version: 4.0.0
Installing a natural text editor
In the tutorial from last week, we created an application that let the user write messages on a graffiti wall. We only let the user write a basic message, so what happens if we add some HTML to the message when we write it? Start the Rails server and give it a try, and you’ll notice that any HTML tags you write in the message won’t be interpreted but will be printed exactly as you wrote them on the wall. We’d like to modify our program so that the user can add things like bolding or changing the background color. In this tutorial, I’ll show you how to add a text editor called CKEditor to your Rails application.
Like last week, the first thing we want to do is make a copy of the project we’re going to change. Run the following commands in the terminal window:
$ git clone https://github.com/wordplay/mvc_tutorial.git
Cloning into 'mvc_tutorial'...

$ cp -r mvc_tutorial/ ckeditor_tutorial
$ cd ckeditor_tutorial/
$ bundle install
If you want, you can change the module name just like we did last week in the section titled, “Update the module information.” Make sure to commit your changes to Git before moving on.
Update the view
The first thing we want to do is make sure that the main page of our application will interpret any HTML code that is added in the message. Currently if we have any HTML tags in our messages, it looks like this:
As you can see, the bold tags aren’t being interpreted. We want to change it so that the lol is actually bold and the tags are not shown. There’s only one change we have to make, so open app/views/static_pages/home.html.erb and change the highlighted line:
<% provide(:title, "Home Page") %>
<% @messages.each do |message| %>
  <div class="row">
    <div class="span3">
      <div style="text-align:right"><%= message.name %> says:</div>
    </div>
    <div class="span9">
      <div class="well"><%= raw(message.message_text) %></div>
    </div>
  </div>
<% end %>
<% if @messages.empty? %>
  <div class="row">
    <div class="well">There are no messages to show.</div>
  </div>
<% end %>
Now if you reload the page in your browser, you should see that the HTML tags are gone, and our message is bolded.
Now when a user is creating a new message, they can type in their own HTML tags to change the way the text looks. We don’t really want our user to have to type in all the tags themselves, so we’re going to add our natural text editor to make it easier to create visually interesting messages.
Installing CKEditor
There are several options available for natural text editors that we could use in our Rails applications. I decided to use CKEditor because it is one of the most popular and has lots of options to customize the interface depending on how much you want the user to be able to do. Open the Gemfile and add the following line:
gem 'ckeditor_rails', '4.2'
Save and run bundle install to get the new gem. The first thing we need to do is have Rails load the Javascript that is included in the gem. Open app/assets/javascripts/application.js and add the highlighted line:
//= require jquery
//= require jquery_ujs
//= require turbolinks
//= require bootstrap
//= require ckeditor-jquery
//= require_tree .
The next thing we need to do is add a little script in our main layout to load the CKEditor interface whenever there is a textarea on the page. Open app/views/layouts/application.html.erb and add the script that starts on line 22:
  <body>
    <%= render 'layouts/header' %>
    <div class="container">
      <% flash.each do |key, value| %>
        <div class="alert alert-<%= key %>"><%= value %></div>
      <% end %>
      <%= yield %>
      <%= render 'layouts/footer' %>
      <%= debug(params) if Rails.env.development? %>
    </div>

    <script type="text/javascript">
      $('textarea').ckeditor({
        // optional config
      });
    </script>

  </body>
It’s important that the script be after any textareas that might be on the page, or they’ll just show up as a regular textarea without the CKEditor interface. This is the reason we put it as the last thing in the body, so there is no chance anything will show up after it.
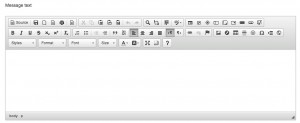
That’s all we need to do to have CKEditor show up for all the textareas in our application. Save all the files you’ve modified and restart the Rails server. Now when you go to either the new message page or edit message page you’ll see the textarea replaced with CKEditor. Play around with the options for changing things like color, emphasis, adding links, and anything else CKEditor offers. When you’ve gotten your fill of testing it out, make sure to commit your changes to Git.
$ git add .
$ git commit -m "Changed textareas to use CKEditor"
The source code for this tutorial can be found on Github at:


