Date published: 10-28-2013
Rails version: 4.0.0
Sorting lists
One thing that comes up fairly often on web sites is the need to sort lists of items. A good example of this would be a wishlist like on the Steam web site. It lets you add items to your wishlist and then sort them so they will be shown in whatever order you prefer. Rails offers a very easy way to create sortable lists, and I’ll show you how to set it up for a basic todo list.
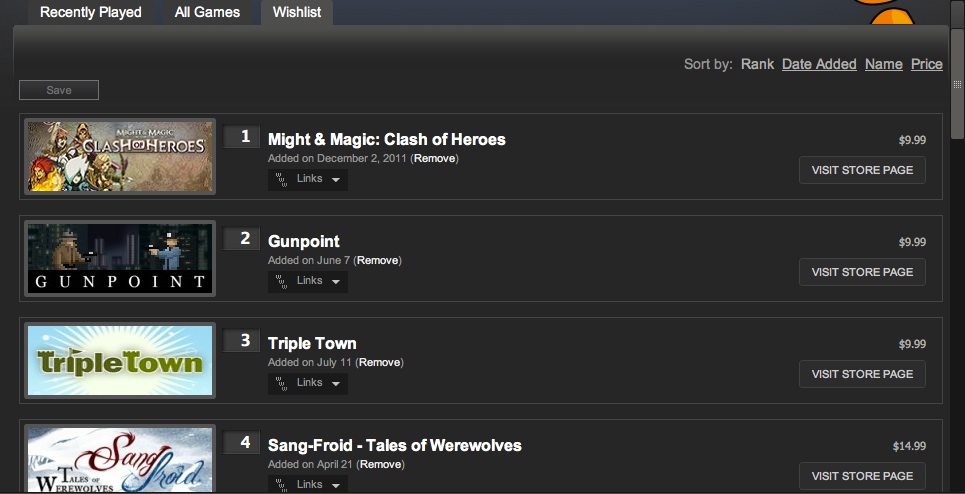
Steam wishlist
Copy the template site
The first thing we need to do is copy our template site and create a new project from it. Open a terminal window and switch to the directory where the template Bootstrap site is located. Run the following commands:
$ cp -r template_bootstrap_site/ todo_list
$ cd todo_list/
It’s a good idea now to change the module name just like we did in this tutorial in the section titled, “Update the module information.” Make sure to commit your changes to Git before moving on.
Creating the todo model
The first thing we need is a way to store our todos in the database, so let’s create the model for that. Switch to the terminal window and type in the following commands:
$ rails generate model todo message:string position:integer
      invoke  active_record
      create    db/migrate/20131007170735_create_todos.rb
      create    app/models/todo.rb
$ rake db:migrate
==  CreateTodos: migrating ====================================================
-- create_table(:todos)
   > 0.0021s
==  CreateTodos: migrated (0.0023s) ===========================================
$ annotate
Annotated (1): Todo
Our todo only has two fields in the database, a message so we know what we need to do and a position which will be updated when we sort the objects in our todo list. Open the app/models/todo.rb file and add the highlighted line:
class Todo < ActiveRecord::Base
  acts_as_list
end
This tells Rails to treat the model specially as a list which gives us access to functionality to sort the list. What we’re going to be doing is mostly automated, but if you’re interested in what functionality acts_as_list makes available, check out the documentation. We need to make sure that Rails knows where to find the acts_as_list gem, so add this line to your Gemfile:
gem 'acts_as_list', '0.3.0'
Make sure to run bundle install after saving the Gemfile so that the gem gets loaded.
Creating the controller
The next thing we need to do is create the controller for todos. If this were a real project, we would want to have all the functionality to create, update, and delete our todos. Since we’re worried just about how to sort lists, we’re only going to create actions for creating new todos and sorting the list. Before creating the controller, let’s add info to the config/routes.rb file so Rails will know where to look when we go to those pages. Add the following to the routes file:
  root 'static_pages#home'
  get '/about', to: 'static_pages#about'

  resources :todos, only: [:new, :create] do
    collection do
      post 'move_higher'
      post 'move_lower'
    end
  end
We’re telling Rails that we only want it to recognize the new and create actions from the defaults and to add an extra action called sort which we’ll call whenever the user changes the position of items in the list. Now create a new file at app/controllers/todos_controller.rb and fill it in:
class TodosController < ApplicationController
  def new
    @todo = Todo.new
  end

  def create
    @todo = Todo.new(todo_params)

    if @todo.save
      redirect_to root_path
    else
      render 'new'
    end
  end

  def move_higher
    todo = Todo.find(params[:id])
    todo.move_higher

    respond_to do |format|
      format.html { redirect_to root_path }
      format.js { @todos = Todo.all.order(:position) }
    end
  end

  def move_lower
    todo = Todo.find(params[:id])
    todo.move_lower

    respond_to do |format|
      format.html { redirect_to root_path }
      format.js { @todos = Todo.all.order(:position) }
    end
  end

  private
  def todo_params
    params.require(:todo).permit(:message, :position)
  end
end
The new and create actions should look familiar, but the sort action is new. It tells Rails to go through each of the todos that are passed back from the browser and set their position based on the order that the user specifies when dragging items around on the page.
While we’re working on controllers, let’s update the controller for the home page so that it will grab all the todos from the database. That way we can use them later to show all the todos on the home page. Open app/controllers/static_pages_controller.rb and add the highlighted line:
  def home
    @todos = Todo.all.order(:position)
  end
Now we need to modify the views so that we can make use of the functionality we’ve created.
Creating the views
First let’s make a view that will let us create a new todo item. Create a new file at app/views/todos/new.html.erb and fill it in:
<% provide(:title, "New Todo") %>
<h1>New Todo</h1>
<%= form_for :todo, url: todos_path do |f| %>
  <p>
    <%= f.label :message %><br>
    <%= f.text_field :message %>
  </p>

  <p>
    <%= f.submit %>
  </p>
<% end %>
You’ll notice that we’re not assigning a value to position. One of the things that acts_as_list does is make sure that when new items are created, the position value is set to be one higher than the item with the highest position. This means new items will automatically show up at the end of the list. Let’s update our header next so we can easily create new messages. Open app/views/layouts/_header.html.erb and update the highlighted lines:
        <%= link_to "Todo List", root_path, class: "brand" %>
        <div class="nav-collapse collapse">
          <ul class="nav">
            <li><%= link_to "Create new todo", new_todo_path %></li>
          </ul>
Now if you start up the Rails server, you can click on the link in the header to create new todos. The next thing we need to do is display them on the home page after they’ve been created. Replace the contents of app/views/static_pages/home.html.erb with:
<% provide(:title, "Home Page") %>
<div class="row">
  <div class="hero-unit">
    <ul>
      <% for todo in @todos %>
        <li><%= todo.message %></li>
      <% end %>
    </ul>
  </div>
</div>
Now if you reload the home page, you should see any todos you’ve created in the list.
Making the list sortable
Now that we can create todos and display them, the only thing left to do is add functionality to the views to let us sort them. If you look back at todos_controller.rb, you’ll notice that we’ve already setup the functionality to handle move a todo to a higher or lower position and respond to both HTML and Javascript formats. Let’s modify our views to use the HTML calls first, and then we’ll add Javascript. The first thing we want to do is put the list of todos in a partial, so create a file called app/views/todos/_todos.html.erb and fill it in:
<ul>
  <% for todo in @todos %>
    <li>
      <%= link_to "↑", move_higher_todos_path(id: todo.id), method: :post %>
      <%= link_to "↓", move_lower_todos_path(id: todo.id), method: :post %>
      <%= todo.message %>
    </li>
  <% end %>
</ul>
Notice that we’ve added links to arrows that will move a todo higher or lower in the list. We need to update app/views/static_pages/home.html.erb to use the partial:
<% provide(:title, "Home Page") %>
<div class="row">
  <div class="hero-unit">
    <div id="todo_list"><%= render 'todos/todos' %></div>
  </div>
</div>
If you reload the home page in your browser, you can click those links and see that it’s all working. Unfortunately, when we click the links to move our todos, it has to reload the page every time which means the user will be sitting there waiting for a long time if there are lots of changes to be made.
We can make our list sorting faster and more responsive by using unobtrusive Javascript to reload only the parts of the page that have changed which in this case is the list of todos. The first thing we need to do is make a small change to the _todos.html.erb partial we just made:
      <%= link_to "↑", move_higher_todos_path(id: todo.id), method: :post,
         remote: true %>
      <%= link_to "↓", move_lower_todos_path(id: todo.id), method: :post,
         remote: true %>
The only change we made was to add “remote: true” to our links. This tells Rails that we want it to use Javascript when running our commands on the server. When we call our move_higher or move_lower actions, it will execute the code inside the call to format.js instead of format.html. Now we need to create our Javascript files that will be called when we click the links. Create two files inside the app/views/todos directory called move_higher.js.erb and move_lower.js.erb and copy the following code into both of them:
$("#todo_list").html("<%= escape_javascript(render(partial: "todos")) %>");
That’s all we need to do in order for our pages to reload the todo list using unobtrusive Javascript. Reload the home page and try using the links to move todos up and down, and you should notice them moving without needing to reload the page. Make sure to commit your changes in Git:
$ git add .
$ git commit -m "Added todo list"
We’ve only scratched the surface of what acts_as_list can do, and I would encourage you to read the documentation to see what other functionality is available. Some changes you might consider making to the todo list to test out what you’ve learned in this tutorial might include:
- Adding the ability to move a todo to the top or bottom of the list
- Checking to see if a todo is first or last and disabling the links to move it up or down
- Adding a link to delete a todo from the list without reloading the whole page by using unobtrusive Javascript
The source code for this tutorial can be found on Github at:


